On Sunday 13th November, I was able to experience first-hand what it is like to be a stall holder at Camberwell Market. This has been on my to-do list for years and I finally stopped with my excuses and went ahead and booked it in.
The cost of the stall is $65, and it generally books out weeks in advance. Usually if you check the website on a Saturday or Sunday, there will be some stalls available for 6 weeks time. Most people sell at Camberwell Market for the purpose of getting rid of unwanted or unused items, but there are some permanent stall holders who have their own businesses. I ended up going ahead and booking this in on my own, though I would recommend sharing a stall with a friend or family member so you don’t feel too stressed out about having to make back the cost of the stall. Luckily, I had heaps of pro bono help from my parents and my boyfriend! (Thanks guys!!!)
I put together a short video of snippets of my preparation and stall layout:
What are you going to sell?
The most important thing to work out is what items you are going to sell. The second most important thing to consider is if you have enough of it to sell. If you are selling more expensive, but fewer items, this probably doesn’t apply as much. However, if you are aiming to get rid of clothes, jewellery, gadgets, books, etc., it is much more worthwhile to have a good quantity of them to sell at the market.
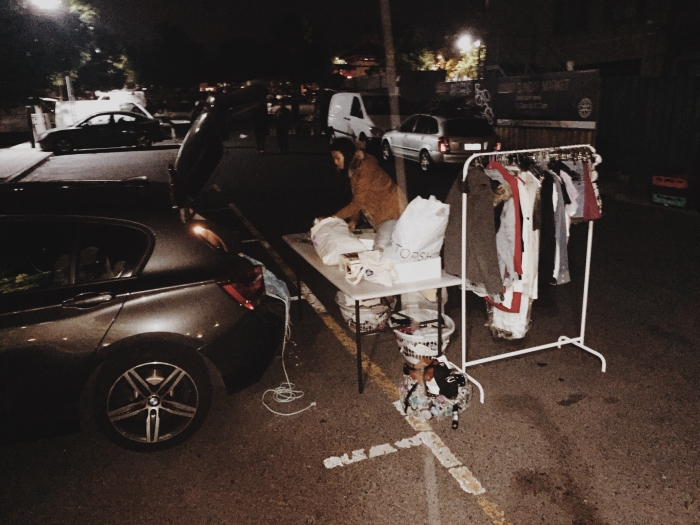
I prepared mainly clothes, shoes, and jewellery to sell. I actually wasn’t really planning on bringing much jewellery or accessories, but I threw it in last minute anyway and I’m glad I did. At 5:30am, without even being given a chance to set anything up yet, I already had people coming up to me with flashlights asking if I had any jewellery. Throughout the day, this seemed like a popular thing that people were looking for. Be prepared for these people who rock up nice and early whilst you’re trying to set up, and try to have someone with you as thieving is something to definitely watch out for. These jewellery-hunters were both men and women probably in their 40s or 50s, and they show up every week to pick out the most valuable items before the market even opens.
I started organising what I was going to sell a few weeks prior, sorting them into categories and attaching price tags to those I thought were worth more. The day before the market, I placed most of the items I wanted to hang up on on hangers and used rubber bands to group them together. This is highly recommended if you want to be able to set up quickly as you can just put each batch of clothes on the racks at one go, rather than hanging each one up individually.
Tips:
- Take out everything you want to sell and start grouping them according to how you want your stall laid out. (e.g. a bag for items to display on a table, items to hang up, etc.)
- Ask around for any items friends/family are willing to donate for your stall (most of the items that sold were actually my mum’s!).
- Pre-hang any items you want to hang on racks.
- Don’t underestimate the potential of selling certain items (you’d be surprised at what people actually buy).
- Keep in mind the cost of the stall and hiring equipment, and be confident that what you put out there is enough to make your time and effort worthwhile!
Stall Layout and Weather!
The logistics of your stall can play a huge role in whether or not people are willing to come over and check out your stuff. Bear in mind when you book a stall that the weather is uncontrollable so be prepared and well-informed about what to expect on the day. I reckon there were about three screenshots on average everyday on my snapchat expressing my disappointment and disbelief about the dreadful weather that was forecasted for Sunday. It started off with a chance of rain; then a few days later it jumped to a 90% chance of showers and strong winds; and on the Saturday before the market, weatherzone decided to top it all off with a chance of thunderstorms in the morning. Lovely.
Not willing to throw my investment away, I did my best to stay positive about my ability to not even make a profit, but to break even. After weeks of preparation and years of wanting to do this, I feared that my efforts would all be washed away by the rain. Thankfully, my dad had just purchased a large umbrella for our courtyard table that pretty much saved my stall. We placed it in the middle and it was just enough to cover the trestle table and the two clothing racks. Throughout the morning we received many comments about how cosy it was! Mum also gave me a few big pieces of plastic that worked to cover the tops of the racks and some items on the table, which we held down with pegs. I was surprised at how many people around us did not seem prepared at all. Two girls a couple of stalls away decided to call it quits before 7am and packed up after setting up their area as it was raining down and didn’t look like it was going to clear up.
The wind was crazy! At one stage, one of my racks blew over and my clothes fell onto the wet ground. As I didn’t have sandbags, dad and my boyfriend kindly took turns holding the rack in place after that. There were a few young girls next to us who had the same issue many times throughout the morning, and at one point their rack fell apart and a section flew into the side of my boyfriend’s car. To much relief, there was no dent or scratch, but also no apology received from any of them. (Where do they teach manners nowadays?)
I would suggest working out whether you have enough clothing racks and/or a table available for what you plan on selling before booking a stall. We had one large clothing rack from home I knew I could use, and a friend of ours was kind enough to let me borrow their trestle table. A clothing rack and sandbags together can be hired for $15 at Camberwell Market. However, if you get a calm sunny day and won’t require sandbags or feel like you can do without them, it’s actually cheaper to just buy a rack from IKEA for $10. That way, you actually get to keep it and it’s available for re-use!
Tips:
- Check the weather throughout the week.
- Be prepared and use judgement to assess what you will need to bring/hire.
- Borrow as much as you can to save costs.
- Decide if you will have enough room to leave your car parked there, or if you will need to park your car in the space available outside of the market to make full use of the 2.2 x 5.5m lot.
Pricing and Signs
As with most flea markets, your general clientele will be rather price-sensitive. From my experience, people were not willing to spend over $25, even for branded items. The demographic included many women (particularly asian women) in their 30s and up, and a fair few older men in their 50s and up. My clothes and shoes definitely targeted a much younger and female demographic so I was quite worried for the first few hours.
Preparing signs is a must to attract people and to communicate your price range and what items you have. Here is an idea of what I did:
- Signs to indicate prices such as “Everything without a price tag is $5”. This saved me from having to individually tag every item and it also makes it easier to lower the pricing throughout the day.
- Signs to switch around to reduce prices and introduce deals, e.g. “Everything 3 for $10.”
- Signs for your extra cheap stuff! Have $1 or $2 bins and make those signs bold and clear.
- Signs to navigate people in your stall. Indicate what type of clothes is on each rack or displayed on the table.
Tips:
- Don’t lower your prices too quickly. People will try to bargain regardless, so keep the starting price higher than what you would be happy to sell it for.
- Identify the clothes you just really want to get rid of and will end up dropping off to donate anyway, and price them attractively.
- It’s okay to say NO. If you think something is worth more than what someone is offering or you feel that you could get a better deal selling on eBay, by all means, turn down offers. I priced a black (not real) leather bag that was in a decent condition at $10, and a woman argued that it was too expensive for non-genuine leather and offered $3. Another lady browsing looked at that woman with a puzzled face and back at us as we politely laughed it off and declined.
- Have lots of change ready!
Other tips that may be useful:
- Prepare spare plastic bags to use for people who buy bulky or multiple items. It is much appreciated at these markets.
- Dress comfortably and suited to the weather conditions!
- If you are holding your stall alone, try and ask someone you know to help out, even if they are not selling anything.
- Try not to drink too much. Yes, it is important to stay hydrated, but you really don’t want to be leaving your items alone if there is no one else to guard your stuff.
- Get there early (recommended 5-5:30am) and bring a torch – watch closely for thieves.
- Print the stall holder information pack you receive through email with your invoice.
- Prepare weeks in advance.
- Try to stay on good terms with your neighbours.
I hope this helps someone, I know that before Sunday I was trying to find as much information as I could to prepare myself. If you have a Camberwell Market experience you would like to share or any tips or questions, please feel free to leave a comment!

You are a life saver!!! I have been thinking of opening a stall at Camberwell for so long and this post will come in handy. I’ve done Suitcase Rummage before which was ok…but I reckon a proper market stall will be heaps better. Thanks so much!
Wendy xx
madein97.blogspot.com
LikeLike
Aww no problem! Definitely do it, it’s a great experience 🙂 Even on a terribly windy and rainy day I still managed to make a profit haha so it’s worth a shot. xo
LikeLike
Thankyou!!!!
LikeLiked by 1 person
Thank you! I am setting up this Sunday and reading your post makes me want to prepare
LikeLike
Is there any particular area you would recommend selecting?
LikeLike